Friday, July 9, 2021

June 2021

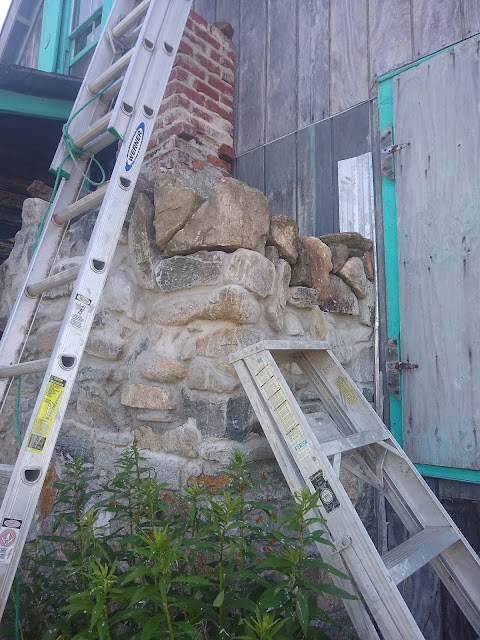
Stainless steel double-walled elbow rises out of the brick

From the elbow, more tubes rise toward the roofline.

Setting the stones in place before adding cement.


Cement added.  This year I mixed some of my father's ashes into the mortar.  

Notice the cement board between the chimney and the house. Looks like the stones placed in 2021 are settling in nicely.  Lichen are welcome to move right in.  


Thursday, August 16, 2018

August 2018


 August 13, 2018


August 14, 2018


August 15, 2018

August 15, 2018


Monday, August 21, 2017

August 2017 -- the "throat"

Two years ago, in 2015, the chimney had reached this stage.  The rock exterior had risen a bit, and Bob had built a "pier" for the brick interior, which supported the box above the fireplace.


Here's a side view of the 2015 stage.


And a top view (below).  You can see the damper is now cemented in place, surrounded by a course of bricks.  This is the box upon which the throat will be built.


In 2017, Chris started building the throat.  All it took was some encouragement from Bob, and a YouTube video.


Above, a course of brick to enclose the damper.

Below, a side view.  Notice that Chris added a few more inches of exterior stone.  How can you tell newly cemented stone from old?  Yellow lichen has had time to grow on the old.  


And a front view.  Sunny day.


Cloudy day.  Chris likes building the exterior stone part.  It's like a puzzle, fitting together all the random rock shapes into an organized "wall."  It's fun!  Anyone can do it.


A couple of days later, Chris started to corbel the bricks, creating an ever-narrowing "throat" that will intensify the rising heat and create a draft.  Will this throat work?  We'll see!


Next day, the throat rose even higher.  Notice the pyramid shape is starting to form.


Chris finished the weekend project with a 12" x 8" opening


The chimney is now ready to receive a "tile", which is a 12" x 8" ceramic tube that gets cemented on top of the bricks, surrounded by bricks.  Sort of like this (below).   That's next year's project.  (Or the year after that....)


Above the tile (surrounded by brick) will be a metal "transition" piece will be fixed in place, which clamps on the ceramic rectangle shape, and transitions to a metal round 10" or 12" opening,  Like this (below)


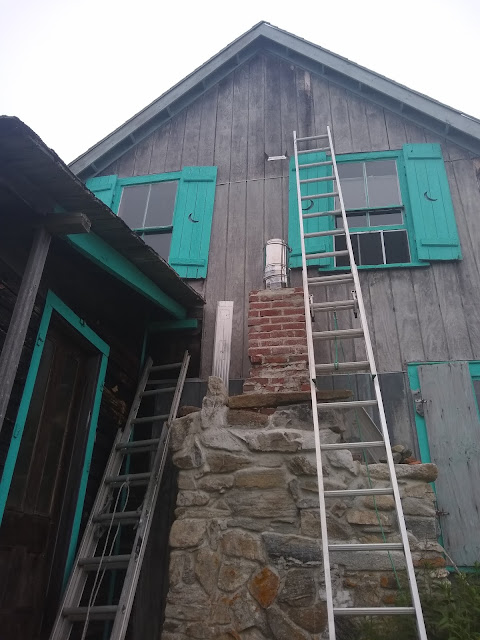
Above that?  Trustees will discuss, but the current thinking is that a double-walled, round (12" or 10") chimney tube will be attached to the exterior wall of  the house,, and will rise above the roof line.  Sort of like this (below).


That's all for now, folks.  The Island Chimney project inches forward.  Stay tuned for future posts.

Here's a selfie for ya.  A barefooted stonemason?  You betcha!

Tuesday, August 25, 2015

August 20 2015

Chris bought a bag of cement and spent a couple of hours laying some stone.  Check out the results!


The new stones are moss and lichen free.  (Not for long!)


Thursday, July 16, 2015

Cinderblock Chimney? A July 11, 2015 idea

The chimney project is a slow one.  Surrounding the chimney flu tiles with native stone takes a long time.  The stones must be selected, placed, mortared. The mortar has to dry before going too high.

Given the limited time that stone masons (all amateurs, with the exception of the exceptional Bob Stafford) spend on the island, the project could take years to complete.

No fires can be built until the project is complete.

Recently, Bob proposed a solution that would hasten the project forward.  Once the smoke box is completed, which is tentatively scheduled to happen later this summer or fall, two solutions could be finished in an afternoon (or two).  That means fires in the fireplace!

Quick Solution # 1:  The metal-and-asbestos solution.  On top of the smoke box, a metal tube rises up to the roofline and above it, fastened to the siding with arms every few feet.  Ugly, perhaps, but cheap.   Here are a couple of examples.   


Since we already have ceramic flue tiles on the island, Bob recommends a different solution if we want to go the "quick" route:  cinder blocks that can be stacked.  Here are some pictures as examples.

This picture shows a cinderblock with the ceramic flue liner inside it.  Note:  we already have the ceramic flue liners on the island.


Prices for these cinder block chimney pieces are about $10 apiece.  I estimate we would need 30 or 40 of them.  They are pretty easy to install.  

Monday, June 29, 2015

June 26-28, 2015

The island chimney project moved forward last weekend.  Participants:  Bob, Patience, Chris (c'est moi), Josey, Jill, Nancy, John, and Leah.

inside

Bob connected the damper control lever, which will open and close the damper.  We found these items (the sleeve, the rod, the brass handle) in niches around the chimney.


Close up of damper control rod being installed.


 Notes:  The connection between the damper rod and damper has not been found.  Searchers should look for the spiral-looking thing in this picture:
Bob adds a course of stones on a bed of mortar.  


Almost done.  
Finished!  Now it's time to let the mortar set.  


Ready for a mantelpiece.


outside

Bob added 4 stacks of bricks that will support the smoke box.  You can see 3 of them just above the native stone.  I've circled one of them.

Side view.  The stacks hold up the first course of bricks that form the smoke box, which will rise above the damper.

Bird's eye view.  The damper is now surrounded by a course of bricks.  The square surrounding the damper will rise and narrow to form the smoke box (aka the "throat") that feeds into the flu that will rise above the roof line.
Closeup:  Bob lays the first course of the smoke box.

Closeup:  the interior stone gets backed up by a course of brick.

Closeup: damper open.

Closeup:  damper closed.